Customizing the Workflow used by an Escalation Rule
Workflows provide a powerful, and flexible, way for Rocketship to interact with PSAs such as Autotask, while providing you as the user the ability to fine-tune how Rocketship adapts to your business processes. Out-of-the-box, Rocketship is configured with pre-set Workflows that are mapped to most Rocketship actions. You can fine-tune this further by creating custom Workflows and mapping those at a rule-level within activities.
Let’s walk through an example.
Let’s say that in addition to the Default Ticket Routing recipe, you have a second Ticket Routing recipe for Alerts. You need this because you’ve outsourced your Alerts management to a 3rd party, and you want a special ticket status to be set when a ticket is escalated to them. For all other Ticket Routing recipes, including the Default, you want a default ticket status of Escalated to be set. But for the Alerts recipe, you want it to be Waiting Subcontractor.
The solution to this is simple:
Create a Custom Workflow
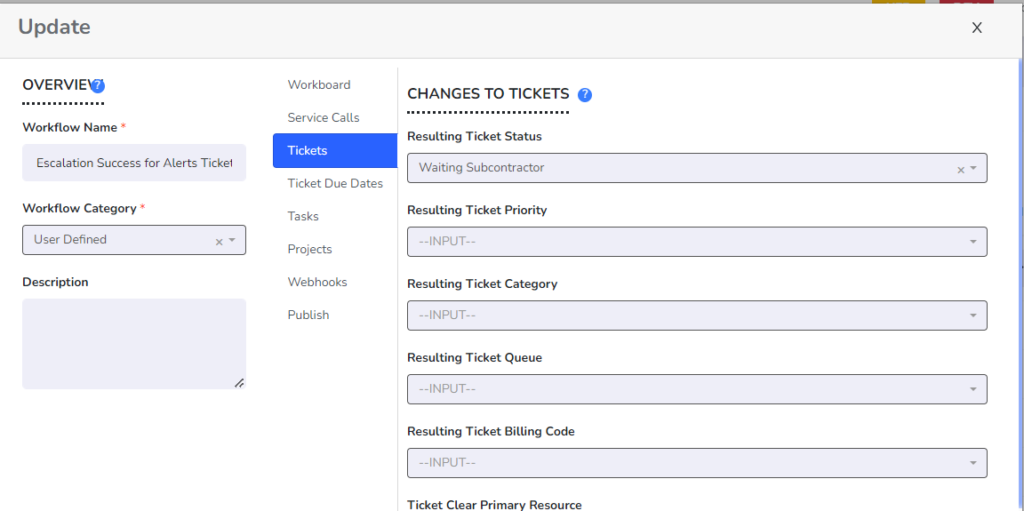
Create a custom Workflow named “Escalation Success for Alerts Tickets”. It should update ticket status to Waiting Subcontractor:

Create Alerts Recipe
Create the Ticket Routing recipe as you normally would and name it Alerts. The only change is that you will set Ticket Queue to match “Monitoring Alert”.
Customize Workflow
Before saving, scroll down to the bottom and choose your custom Workflow for Success:

Your final recipe will look as follow. It will behave like all other recipes, except it won’t use the default Workflow for success. Instead, it will use this custom Workflow.

