As you grow, you’ll find that you need to segregate your customers for various reasons. For example, you may have an IT department and a Software Dev team, and you want special rules in place so that your IT team only sees IT customers and your software team can only see Software Dev customers.
To do this, you should use the Autotask Line of Business (LOB) functionality. It’s designed exactly for this type of separation.
Put another way: Think of an Autotask LOB as how General Electric (GE) has separate lines of business for airplanes vs refridgerator manufacturing. The two businesses fall under GE, but they aren’t related, they don’t share financials, and they don’t share staff. Because of that, GE treats them separately, but still under the umbrella of “GE”. That’s how an Autotask LOB works.
Let’s set this up, so that:
We have two LOBs, we assign certain customers to each LOB, and we assign certain Autotask resources to each LOB. In this way, we segregate those two business lines.
WARNING: Once you enabled LOBs, you can’t go back!
Create the Autotask Line of Business
- Click on Admin->Account Settings & Users->Your Organization->Organizational Structure
- Create the Division “General”.
- Create the two LOBs “IT Work” and “Software Dev”.
- Be sure to associate each to the General division.
Assign Customers
Well, that’s not how this works! Instead, you assign items that will ultimately be billable to a LOB. Keep reading.
Create Billing Codes
To maximize the use of LOBs, you can create separate Billing Codes for each LOB. If you think about it, it should make sense why! If you have a LOB for IT Services and an LOB for Software Dev, the two billing models will likely be very different.
So let’s create the Work Types: IT:Onsite and SW:Project.
You are likely already using multiple Billing Codes, so what value does this actually add? It’s when you define custom Ticket Categories that the power of LOBs really kicks in.
Create Ticket Category
The next important step in using LOBs is to create a Ticket Category for each LOB. A Ticket Category (or Task Category for Projects) is a defined window into the Autotask database that restricts what can be accessed. It lets you customize workflow to exactly match the need, instead of having your team have to remember what goes where.
Let’s try it out.
- Go to Admin->Features&Settings
- Click on Service Desk
- Click on Ticket Categories
- Click on COPY for the Standard Ticket Category
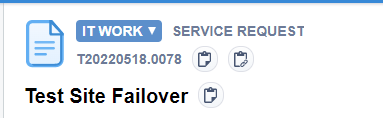
When you do the COPY, it will open the new Ticket Category. Set the name to: IT Work.
Refining What Techs See in Each Ticket Category
The key here is to start REMOVING what is not relevant to IT Work. Below, we should common items to edit, but in fact you can tweak almost everything that can be seen via Ticket Categories.
- Click on the Details tab
- Go to Sections & Fields
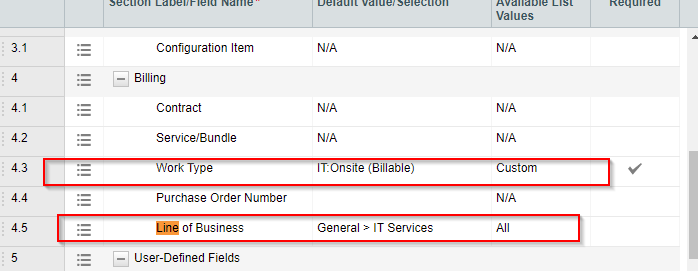
- Drag Line of Business from Hidden Fields to the Billing area
- Click the “Default Value” section to set it to your IT LOB (see screenshow below)
- Click Ok
- In Sections & Fields, locate Work Type
- Set the Default to: IT Onsite
- Click the pencil to open the “Configure List Values”
- Remove everything that is not related to IT (refer to screenshot below)
- Click Ok
- Click Save & Close
That’s it! Naturally, you can really fine-tune this Ticket Category, but it’s ready to work now as your template for all IT LOB work. Now, when you apply this Ticket Category to a ticket, anything related to that ticket, including labor, parts, whatever, will be flagged as belonging to your IT LOB.
Additionally, when a tech wants to bill work, they will ONLY see the IT Work Types. That’s key as it ensures the wrong Work Types are never used.
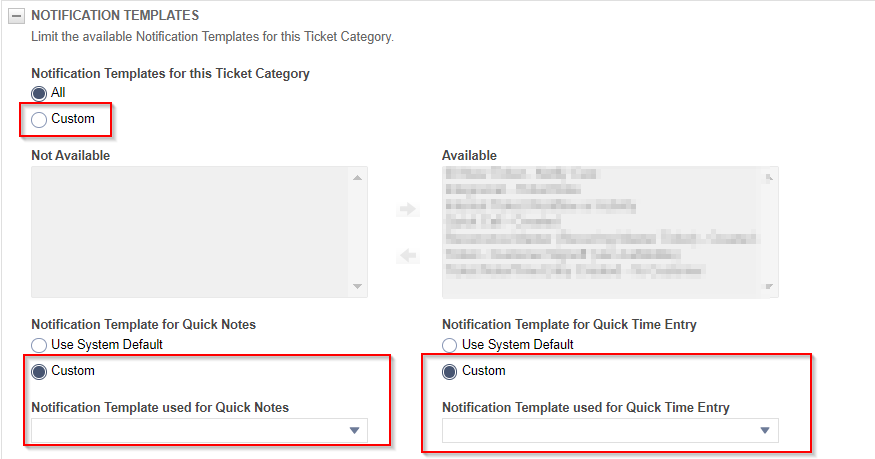
Some people also like to use Ticket Categories to tweak what customers see. This can be done via the same Ticket Category edit screen under Notification Templates:
Other Items
This is a high-level, quick review of LOBs. There are a lot of other features. You can edit which Resources can use which LOBs for example, you can add/remove what is seen in a Ticket/Task Category (this is useful in reducing clutter in tickets/tasks based on the work being done).
You can also configure the Autotask/QBO integration to use LOBs. This is a more advanced approach and best done after you have tested and finalized your LOB configuration, Billing Codes, etc.